PTZ Quickstart (Panasonic)
How to connect everything between a Seervision Server and Panasonic's PTZs
This page guides the user through the setup of a new Seervision Server to control a Panasonic PTZ. If you have a different PTZ or robotic head, see our other Quickstart articles instead.
You will need to have our web interface open and ready to go – if you’re not certain how to get to it, read our manual’s Getting Started chapter first.
Connecting the Seervision server and the Panasonic
A note on the PTZ IP
Regardless of how you will be using it, the PTZ will always serve its own configuration interface over its LAN port. We don’t change or affect that IP. If you can’t find this IP, you can use Panasonic’s EasyIP which will usually find it without issue (provided you are connected to the same network as the PTZs LAN port).
To enable the Seervision server to control the Panasonic PTZ, go into the Operations Server of the Seervision server and create a new configuration.
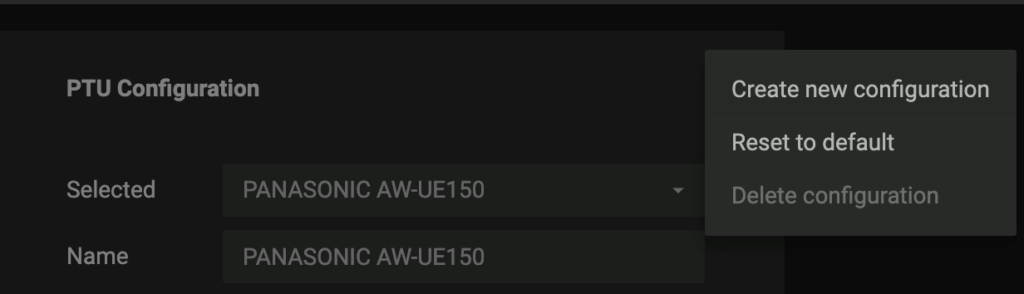
- Give it a Name that is easy to remember
- For PTU, select the relevant PTU driver from the dropdown, which should correspond to the model you wish to control
- Under IP, add the IP of the PTZ
- Under Model and Lens, make sure to select the relevant model and corresponding lens to get the best tracking and control performance
- Hit Save, and launch or re-launch the system if necessary to load the configuration
That’s it!
Configuring newer Panasonics
If you have a Panasonic model released after 2019 (AW-UE100, AW-UE150, AW-UE80), you’ll need to modify a couple more settings on the PTZ itself, all of which can be found under the Setup tab of its web interface.
Make sure to double-check this step was correctly performed. Not correctly configuring the PTZ will inevitably lead to subpar performance.
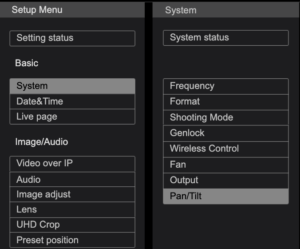
- In the left-hand menu, under Basic, navigate to System > Pan / Tilt
- Make sure the Install Position is set to what you’re using (hanging or standing). This is important for the flipping of the output feed (which we process)
- Change the P/T Speed Mode to the fastest available
- Set Speed with Zoom Position to OFF
- Only for AW-UE100: Make sure that Focus Adjust with PTZ is set to off
- Navigate to Tracking Data Output > Connection Type and double-check that the Serial column is set to Off (it should be by default)
- Only if you want the SV Suite to control the focus (not recommended): Navigate to the Image/Audio pane in the left-hand menu bar, select the Lens option, and change Focus Mode to Manual
Configuring FreeD on newer Panasonic models
Both the AW-UE100 and the AW-UE150 from the Panasonic PTZ line are the fastest devices available, and offer substantially better tracking performance than the older models. They require some additional configuration of the FreeD protocol, which the older models don’t support.
What you’ll need:
- A Seervision server
- A PTZ (AW-UE150 or AW-UE100), connected to the same LAN as the Seervision server, updated to the latest Pansonic firmware
- Make sure that both the PTZ and the Seervision server are on the same LAN, i.e. they can “see” eachother via IP
Getting set up:
- Enable FreeD on the PTZ. Navigate to the PTZ’s configuration interface, then to Tracking Data Output > IP Out. There, enable any of the output clients, and configure the enabled output client to point to the LAN IP of the Seervision server and set the port to 1112.
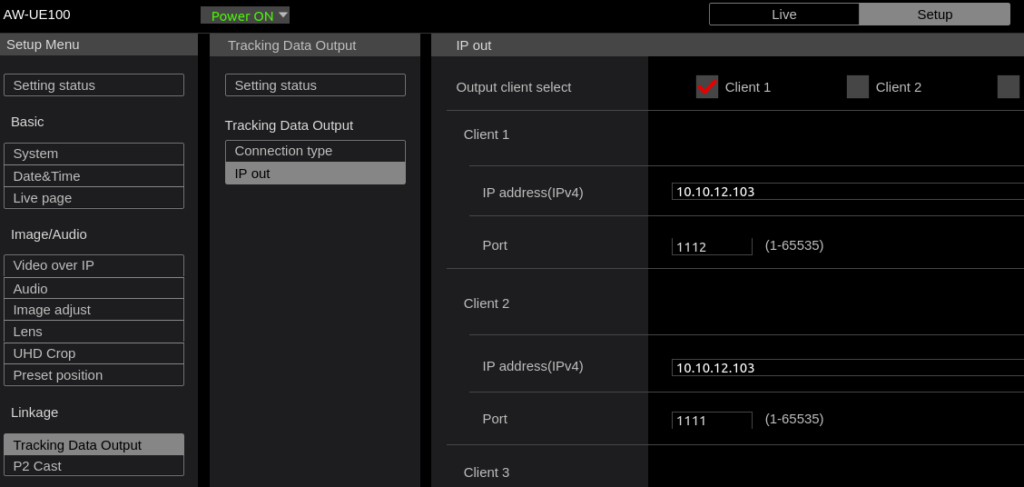
If you are running multiple instances of the Seervision Suite on the same server, this FreeD port number will increase by 1 for each additional instance. E.g. if you are automating two Panasonics 100/150 with a single Seervision server, the first Panasonic should be configured to use port 1112 (as written above), and the second Panasonic should use port 1113.
- Under Tracking Data Output > Connection Type make sure that IP Communication is enabled.
- Double-check that the Seervision server is trying to connect to the correct PTZ IP. You can do this by opening up the Operations Server on the server and verifying that the PTU IP field is set to the correct PTZ IP.
- Re-launch the Seervision Suite from the Operations Server to make sure it picks up the FreeD packets.
All done!
That should be it from a hardware perspective. The next thing you’ll want to do is hook up the SDI or NDI® feed to the Seervision server, we go into more depth on that here: SDI/NDI® and Seervision. If you’ve already handled that, then just directly go to the Seervision Server Setup page.
Disclaimers: NDI® is a registered trademark of Vizrt Group.